One key skill Avid audio engineers must master early on is learning how to add plugins to Pro Tools. It’s an essential step in expanding your creative arsenal. Whether polishing a personal project or fine-tuning a professional mix, the right plugins can transform your audio experience. This guide will explore everything you need to know about adding plugins to Pro Tools. We’ll cover everything from checking compatibility to managing your growing collection of tools.
Let’s jump in and break it all down for you!
Does Pro Tools Support Plugins?
Yes, Pro Tools supports plugins and offers a robust platform for enhancing your project with plugins. When you download Pro Tools, it includes a bundle of native plugins off the bat. These encompass a range of tools essential for audio editing and mixing. They are also a part of the package with Pro Tools Studio and Pro Tools Ultimate subscriptions.
The primary plugin format used in Pro Tools is AAX (Avid Audio eXtension). AAX plugins are notable for their excellent performance and compatibility with Pro Tools. They offer various effects, virtual instruments, and audio processing tools.
Additionally, Pro Tools supports older plugin formats like RTAS (Real-Time AudioSuite). However, it is worth noting that these are being phased out in favor of the more advanced AAX format
How Plugins Can Improve Your Artistic Workflow
Plugins significantly enhance the capabilities of Pro Tools, offering an expansive array of effects and tools that can transform your audio production process. They are pivotal in refining your sound, whether it’s through advanced EQ, dynamic processing, or creative effects.
The versatility of plugins allows for a customized audio production experience, enabling users to tailor their workflow according to their project’s needs. With a variety of plugins available, from basic utilities to advanced sound design tools, you have the flexibility to experiment and find the perfect sound for your project.
This adaptability and range of options make plugins indispensable in modern audio production. They provide you with the tools to realize your unique artistic vision effectively.
Preparing Pro Tools for Plugin Installation
Before diving into the actual plugin installation process, it’s crucial to set up Pro Tools properly. This involves ensuring the software is installed correctly, and your system meets the requirements.
When installing Pro Tools, you can download and install the DAW along with its bundled plugins all at once using the Avid Link standalone application. This application simplifies the process, centralizing everything in one place.
Remember, it’s recommended to close Pro Tools when installing new plugins. This is because Pro Tools scans for plugins each time it is launched. Also, uninstalling past versions of Pro Tools before installing a new one ensures a clean, complete installation.
This setup phase is essential for a smooth plugin integration later on.
Ensuring Compatibility Before Adding Plugins
When adding plugins to Pro Tools, ensuring system compatibility and understanding version-specific requirements is essential.
Firstly, check if your computer meets the Pro Tools system requirements. This includes compatibility with your operating system, processor, and RAM, as outlined in Avid’s guides. This step is crucial because using Pro Tools on a non-compatible system can lead to performance issues.
Regarding version-specific plugin compatibility, Pro Tools 11 and later versions utilize AAX 64-bit plugins, renowned for their seamless integration and stability.
On the other hand, Pro Tools 10 and earlier versions are compatible with AAX 32-bit, RTAS, and TDM plugins. However, it’s important to note that the older formats are gradually being replaced by the more efficient AAX format.
The installation paths for plugins also differ between Windows and macOS, so ensuring that plugins are installed in the correct default locations is vital for Pro Tools to recognize them correctly.
Lastly, the installation process is streamlined through the Avid Link standalone application. You can download all components at once or select specific plugins.
For a clean and complete installation, it’s also advisable to uninstall past versions of Pro Tools before the new installation. This preparation ensures a hassle-free integration of plugins into your Pro Tools setup.
How to Add Plugins To Pro Tools (Step-By-Step)

Next we will walk you through the process of how to add plugins to Pro Tools in a few simple steps.
Step #1) Download the Plugin from a Trusted Source
The first step in adding plugins to Pro Tools is downloading them from a reliable source. It’s crucial to ensure that you download the AAX version of the plugin, as this is the native format for Pro Tools plugins.
Typically, plugin manufacturers provide these on their websites. Downloading a plugin generally comes as a .zip or .pkg file, depending on your operating system.
Make sure to follow any specific instructions provided during the download process.
Step #2) Locate the Downloaded Plugin File on Your Computer
After downloading the plugin, the next step is to locate the file on your computer.
- For Mac Users: The downloaded plugin file typically saves to the Macintosh HD, Desktop, or another folder you might have specified during the download.
- For Windows Users: The default download location is usually the Downloads folder. However, you might have chosen a different folder during the download process.
Accurately locating the downloaded file is crucial, as you must be able to access it to complete the installation.
Step #3) Add the Plugin File to Pro Tools’ Plugin Directory
Once you’ve downloaded the plugin, the next step is to ensure it’s properly placed in Pro Tools’ plugin directory. This process varies slightly between Windows and macOS:
For Windows Users:
- Locate the Plugin: Go to the folder where the plugin was downloaded.
- Install Location: The typical installation path for Pro Tools 11 and later versions (using AAX plugins) is C:\Program Files\Common Files\Avid\Audio\Plug-Ins.
- Move the Plugin: If the plugin is not automatically installed in this directory, move it there manually.
For macOS Users:
- Locate the Plugin: Find the downloaded plugin in your chosen folder or the default download location.
- Install Location: The usual path for AAX plugins in Pro Tools 11+ is Macintosh HD/Library/Application Support/Avid/Audio/Plug-Ins.
- Move the Plugin: Manually place the plugin in this directory if it’s not already there.
Ensuring the plugin is in the correct folder for Pro Tools to recognize and utilize it properly is essential.
Step #4) Configure the Added Plugin’s Settings if Necessary
After adding the plugin to Pro Tools, you might need to configure its settings:
- Open Pro Tools: Launch Pro Tools and open a session.
- Access Plugin: Find your newly added plugin in the relevant menu within Pro Tools.
- Adjust Settings: Each plugin will have its unique settings and interface. Adjust these as needed for your project.
Step #5) Restart Pro Tools
Finally, to ensure that Pro Tools correctly recognizes and integrates the new plugin, a restart is often necessary:
- Close Pro Tools: Ensure that Pro Tools is fully closed. You can check this in your system’s task manager.
- Restart the Software: Reopen Pro Tools.
- Verify Plugin: Check if the new plugin appears in the list and is functional.
This step completes the process of adding a new plugin to Pro Tools. At this point, the plugin should be ready for use in your projects.
Following these steps, you can effectively integrate new plugins into your Pro Tools setup, enhancing your audio production capabilities. Each step ensures smooth integration and functionality of your new tools within Pro Tools.
Download our most popular resource: 6 Steps for Creating Radio Ready songs to learn the fundamentals of what goes into a professional mix from renowned Producer, Songwriter & Mixer Warren Huart, who has worked on several Grammy-nominated albums!
Managing and Organizing Plugins in Pro Tools
Effective management and organization of plugins in Pro Tools are essential to streamline your workflow and enhance productivity.
Keeping Your Pro Tools Plugins Updated and Efficient
Managing a large number of plugins in Pro Tools requires a strategic approach to minimize time spent scrolling through lists and maximize creativity and efficiency. Here are some key strategies:
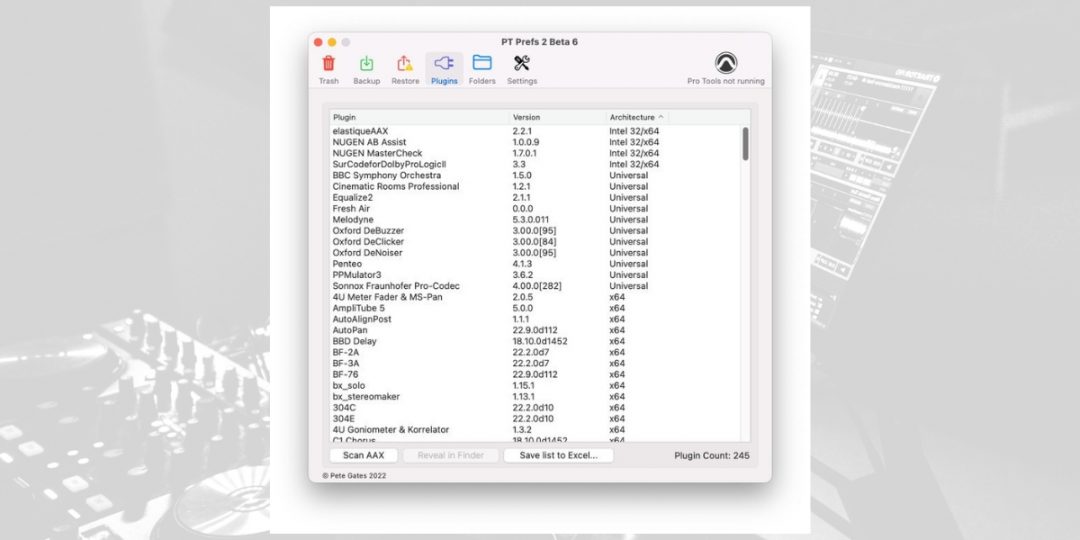
- Organizing Plugins: Pro Tools offers several options for organizing plugins within its interface:
- Flat List: Lists all plugins alphabetically in a single list. While comprehensive, this can become unwieldy with a large number of plugins.
- By Category: Plugins are organized by their function (e.g., EQ, Dynamics, Reverb). This is similar to the layout in analog studios and helps with easy identification.
- By Manufacturer: Grouping plugins by their manufacturer can be particularly useful if you often use plugins from specific companies.
- Category and Manufacturer: Combines the above two methods, offering a balanced approach to plugin organization.
- Setting Favorites: Pro Tools allows you to mark certain plugins as ‘Favorite,’ which appear at the top of the plugin list for quick access. This feature can significantly speed up your workflow, especially when using specific plugins frequently.
- Search Function: Pro Tools also includes a search function at the top of the plugin menu. It allows you to quickly type in the name of a plugin for quick access. This is particularly handy when you know exactly which plugin you need but want to avoid navigating through menus.
- Regular Updates: Keep your plugins updated. Update plugins often come with bug fixes, new features, and optimizations that can improve performance and stability. Also, keep your version of Pro Tools updated.
- Workflow Tips: Use the default EQ and Dynamics settings to quickly access frequently used plugins.
Understand your creative needs and organize your plugins accordingly. Whether mixing, mastering, or creating music, knowing where your tools are can save valuable time.
Looking To Enhance Your Pro Tools Workflow Even More?
Elevate your Pro Tools skills with our best-selling course, The Ultimate Guide To Pro Tools, led by the acclaimed instructor Jon Connolly. This comprehensive course is tailored for both newcomers and seasoned users.
It delves into the intricacies of Pro Tools, covering everything from system setup and optimization to advanced recording, editing, and mixing techniques. You’ll learn to streamline your workflow, harness Pro Tools’ powerful features, and bring a polished, professional quality to your projects.
Don’t wait to enroll; this course is a gateway to mastering Pro Tools and enhancing your creative output!


