One of the things that makes Reaper such an outstanding DAW is that it offers a versatile range of customization options. If you are recording in Reaper, SWS extensions can help dial in and streamline your workflow. This guide will look at how to use Reaper SWS extensions. We will include everything from downloading and accessing extensions to our top 5 most-used extensions.
Whether you’re a beginner or a seasoned Reaper user, you’ll find valuable insights and practical tips to boost your productivity.
What Are SWS Extensions for Reaper?
Reaper SWS Extensions, also known as the SWS/S&M Extension, are a set of custom scripts and actions that greatly expand the functionality of Reaper. These extensions are developed by a dedicated community of Reaper users and are designed to help optimize your workflow.
SWS Extensions add functionality to Reaper, including automating repetitive tasks and providing shortcuts to improve your recording, editing, and mixing processes. Some of the key functionalities include advanced project management, custom actions, improved automation, and enhanced MIDI editing capabilities.
Best of all, Reaper SWS extensions are available on a donationware distribution model. This means the software is free to download and use, with the option to leave a donation to support its creators.
Leaving a donation for SWS extensions is worth it if you can afford to do so because it supports the ongoing development of these valuable tools. It also encourages the creators to continue enhancing the music production experience, which benefits everyone.
How To Use Reaper SWS Extensions
 When you’re ready to enhance your Reaper workflow, follow the steps below to download, install, and begin using SWS extensions.
Downloading and Installing SWS Extensions
- Download the Extension: To utilize SWS extensions, download the software free from sws-extension.org. The homepage here allows you to leave a donation if you’d like to. To download the software, simply click the download link for the SWS Extension that matches your operating system (Windows, macOS, or Linux).
- Install the Extension: Once downloaded, simply follow the installation instructions provided on the download page. Typically, this involves copying the downloaded files to a specific folder in your Reaper directory. The process may vary slightly depending on whether you are downloading to a Mac or PC.
- Restart Reaper: Once the files are in place, restart Reaper to activate the SWS Extensions
Using SWS Extensions
Once you have installed the SWS software, you are ready to start using the various tools this extension offers! Follow the instructions below, which outline how to use Reaper SWS extensions.
Updating and Removing SWS Extensions

- Launch Reaper: Begin by opening Reaper on your computer, ensuring that the SWS Extensions have been successfully installed as per the installation instructions.
- Access SWS Extensions: Now navigate to the “Extensions” menu in the top menu bar of Reaper.
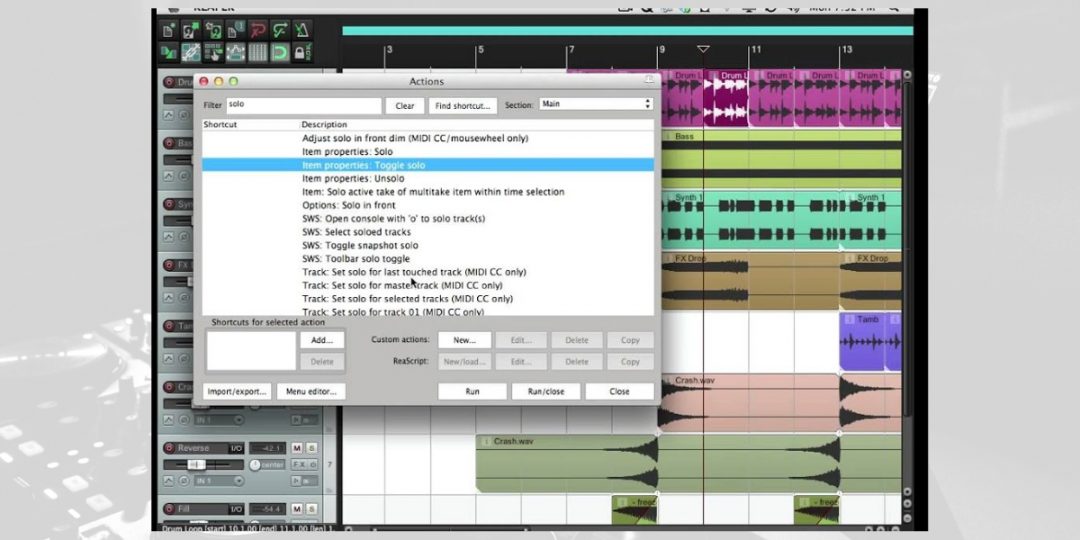
- Browse SWS Actions: Within the SWS Extensions menu, you’ll find a list of SWS actions designed to automate tasks and provide useful shortcuts.
- Select an SWS Action: Next, choose an SWS action from the list that aligns with your needs. These actions often have descriptive names to help you identify their functions.
- Assign the Action: After selecting an SWS action, you can assign it to a keyboard shortcut, mouse gesture, or toolbar button by clicking on it in the SWS Extensions menu.
- Customize Action Settings (Optional): Depending on the specific SWS action you’ve chosen, you can customize its settings to better align with your workflow preferences.
- Use the Assigned Action: With the action assigned, you can now use it in your project. For instance, if you’ve assigned an SWS action to a keyboard shortcut, press the designated key combination to activate the action.
- Explore More SWS Actions: Continue exploring the SWS Extensions menu and assigning additional actions as needed. Each SWS action serves a distinct purpose, allowing you to tailor Reaper to your requirements.
- Experiment and Learn: Feel free to experiment with different SWS actions to discover how they can optimize your workflow. With practice, you’ll become more proficient in leveraging these tools effectively.
- Keep Extensions Updated: Finally, we recommend that you periodically check for updates to the SWS Extensions. The Reaper community frequently releases new versions, incorporating additional features and addressing issues.
Top 5 SWS Extensions To Enhance Your Workflow In Reaper
Now that you’ve got SWS extensions up and running, there is no limit to what you can achieve creatively. While SWS offers a range of tools, we often find there are several tools we always come back to.
Below are our top 5 SWS extensions that can help you get the most out of your project.
#1) Snapshots
Snapshots is a handy tool that allows you to save and recall different project states with the click of a button. Snapshots allow you to experiment with alternative arrangements, effects, and settings without fear of losing your original work.
When you create a “snapshot” of your project, Reaper will save all current settings, track configurations, and automation data. Snapshots allow you to recall and switch between different saved states effortlessly. This makes Snsapshots an invaluable feature for A/B testing and creative exploration.
Why it’s useful: Snapshots promote creativity and organization by offering a safe space to experiment with your project’s direction. They also serve as a quick way to compare different mix versions, ensuring you make informed decisions during production.
#2) Auto Color/Icon
Auto Color/Icon is a time-saving utility that simplifies track organization in Reaper. It automatically assigns colors and icons to tracks based on user-defined criteria.
This extension analyzes your project’s tracks and applies visual cues, such as color codes and icons, to each track. Users can then customize the criteria to match their project’s requirements, making it a versatile tool.
Why it’s useful: Auto Color/Icon simplifies your workflow by providing a visual hierarchy for your tracks. It also makes managing and navigating complex projects more manageable. This enhanced organization saves valuable time during recording, editing, and mixing in reaper. It allows you to instantly identify the type and purpose of each track.
It also reduces the need for manual track labeling and enhances project clarity, allowing you to focus on the creative aspects of your music production.
#3) MKslicer
MKslicer is a genius MIDI editing tool that simplifies the process of slicing and manipulating MIDI items in Reaper.
It allows users to select a MIDI item, activate MKslicer, and define slicing points based on note events or time divisions. This extension then divides the MIDI item into separate sections, enabling precise editing and arrangement.
Why it’s useful: MKslicer provides greater control over MIDI data, making it ideal for intricate MIDI arrangements, remixing tracks, and exploring innovative sound design. Its ability to split MIDI items based on note events or time divisions facilitates creative freedom. Ultimately, this allows you to experiment with diverse musical ideas.
Because of this, this tool is indispensable for those seeking to maximize precision and versatility in their MIDI editing.
#4) Cycle Action Editor
The Cycle Action Editor in Reaper allows users to create custom action sequences, optimizing the DAW for efficient production. It streamlines tasks and intricate workflows, such as mixing and editing, through sequences assigned to shortcuts or buttons.
Why it’s useful: This tool is indispensable for automating various tasks in Reaper. Assigning action sequences to shortcuts or buttons ultimately simplifies repetitive and complex operations like mixing and editing. It also makes your workflow more efficient and tailored to your needs.
#5) Loudness Analysis & Normalize
Reaper’s Loudness Analysis & Normalize tools are essential for maintaining balanced audio levels in your projects.
This is because Loudness Analysis examines your audio to evaluate its loudness characteristics, ensuring that no part of your project is too quiet or loud. When the analysis is complete, Normalize will automatically adjust your audio to meet your desired loudness specifications, ensuring all your tracks sound consistent and polished.
Why it’s useful: These tools ensure that your audio maintains consistent and professional loudness levels across all tracks in your project. It is also particularly helpful for beginners who may not have a trained ear for audio levels. This is because it automates the process, guaranteeing that your music always sounds its best.
Download our most popular resource: 6 Steps for Creating Radio Ready songs to learn the fundamentals of what goes into a professional mix from renowned Producer, Songwriter & Mixer Warren Huart, who has worked on several Grammy-nominated albums!
Looking To Improve Your Reaper Workflow Even Further?
Now that you have seen how SWS extensions can greatly enhance your workflow, you’re ready to take things to the next level. If you’re tired of having to interrupt your creative flow to look up how to do routine tasks in Reaper? We recommend checking out our Ultimate Guide To Reaper course next. This in-depth course teaches you everything you need to know about recording and mixing songs in Reaper.


