Waveforms in Pro Tools are like the heartbeat of your music production. They’re the visual representation of sound, pulsing with information about every note, every beat, and every nuance. If you’re looking to fine-tune your audio recordings and make precise edits, understanding how to change waveform size in Pro Tools is a crucial skill to have in your arsenal.
In this guide, we’ll first explore waveforms and their significance in the world of audio editing. We’ll also walk you through the step-by-step process of tweaking their size in Pro Tools to suit your creative needs.
What Are Waveforms?
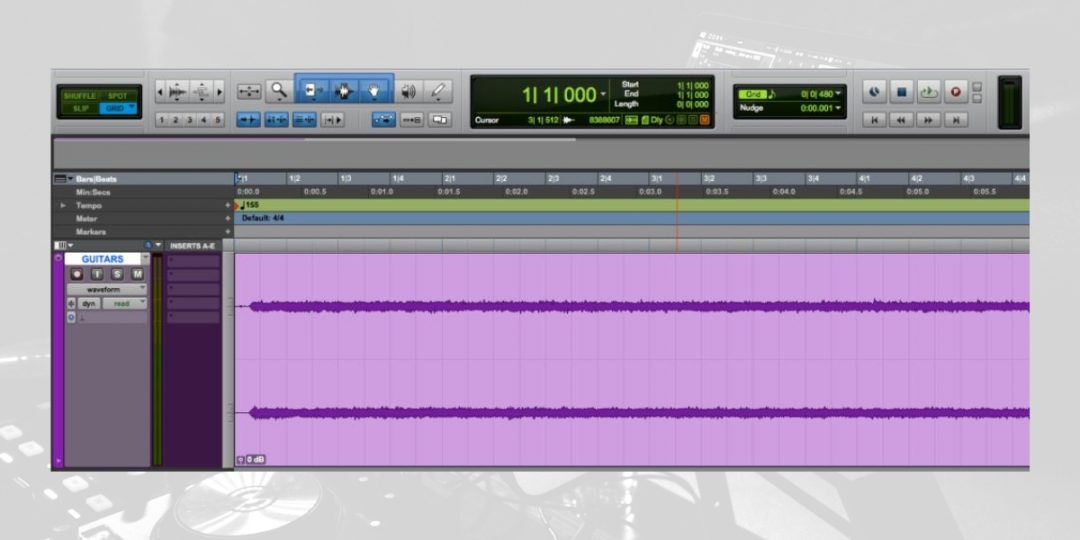
Waveforms are visual representations of audio signals within a DAW. They depict how the sound’s amplitude changes with time, providing insights into its loudness and dynamic range. Therefore, when viewing a waveform graph, high peaks indicate louder sounds, while lower troughs signify softer ones.
These graphical illustrations are fundamental to audio work, as they allow engineers to analyze and understand the physical characteristics of sound within a recording or editing platform.
Furthermore, waveforms offer a unique perspective on the audio’s properties, allowing engineers to make precise edits and adjustments as needed.
How to Change Waveform Size in Pro Tools: Step-By-Step

Now that you have a basic understanding of how waveforms work let’s break down how to change waveform size in Pro Tools. Remember, changing your waveform size to your preferences can help expedite and streamline your process.
#1) Accessing The Pro Tools Waveform Zoom Control
First, to zoom in on waveforms, use the Audio Zoom button in the toolbar. If the toolbar isn’t visible, enable it via the drop-down menu near the edit window’s top right.
Subsequently, clicking the upward arrow on the Audio Zoom increases waveform size; the downward arrow decreases it. Remember, zooming affects visual size, not audio loudness.
#2) Utilizing Pro Tools Waveform Size Shortcut for Efficiency
Generally, keyboard shortcuts can expedite waveform zooming. On PC, ‘Shift + Alt‘ with the mouse wheel adjusts zoom. ‘Ctrl + Alt + ]‘ zooms in, and ‘[‘ zooms out.
Mac users will use ‘Shift + Option‘ and the mouse wheel or ‘Command + Option + ]‘ and ‘[‘ for the same actions.
Ultimately, these shortcuts save time, allowing quick transitions between detailed edits and broader session views
- RELATED: How To Reverse Audio In Pro Tools
#3) Adjusting the Pro Tools Waveform View for Optimal Clarity
Furthermore, different waveform views in Pro Tools, including Peak, Power, and Rectified, cater to specific editing needs, from detailed clipping analysis to RMS-level editing and volume automation.
- Peak View: This is the default setting where waveforms are depicted by their sample-by-sample peak levels. It’s particularly useful for spotting clipping, as these peaks will stand out visibly if the audio has been recorded too loudly.
- Power View: This mode calculates waveform overviews based on the Root Mean Square (RMS) average. RMS provides a more accurate representation of how loud a signal feels to the human ear. In mastering, where a nuanced understanding of a track’s loudness and dynamics is essential, Power mode offers an invaluable perspective.
- Rectified View: In this view, Pro Tools combines positive and negative amplitudes into a single positive value. This can simplify tasks such as volume automation, as it creates a cleaner, more unified visual representation of the waveform, making it easier to align changes in volume with the waveform itself.
- Using Outlines: Regardless of the view you choose, adding an outline to the waveform can improve visibility, especially when zoomed out, helping you distinguish between multiple small clips in a large session. However, it might be less valuable when making detailed edits, where a clearer view of the waveform’s fine structure is needed.
Each view can be toggled through the ‘View > Waveforms‘ menu, allowing you to customize the waveform display to best suit the task at hand. Overall mastery of these waveform options can lead to a more refined and efficient editing workflow within Pro Tools.
 Benefits of Customizing Waveform Size in Pro Tools
Furthermore, customizing waveform size in Pro Tools can bring several benefits:
- Enhanced Visual Cues: Larger waveforms can make it easier to see the details of the audio, such as transients and envelope characteristics, which are crucial for precise editing.
- Improved Editing Accuracy: Additionally, with appropriately sized waveforms, selecting precise points for editing, like cutting or aligning, becomes more accurate.
- Efficient Workflow: Adjusting waveform size can help toggle between detailed editing and a broader session view, streamlining the workflow.
- Tailored Editing Experience: Finally, different tasks may require different waveform views; customization allows the engineer to choose the most suitable view.
Common Pitfalls: Avoiding Waveform Size Mistakes in Pro Tools
Although adjusting your waveform size can be helpful, it can be deceptive if you aren’t careful. When customizing waveform sizes, certain pitfalls should be avoided:
- Misinterpreting Waveform Size for Volume: It’s essential to understand that waveform size does not equate to loudness; larger waveforms are not necessarily louder.
- Overlooking Clipping: Ensure the waveform size adjustment does not obscure potential clipping indicators.
- Ignoring Project Context: The size that works for one project may not be suitable for another; constantly adjust waveform size in the context of the current project to make sure you are hitting the mark.
Download our most popular resource: 6 Steps for Creating Radio Ready songs to learn the fundamentals of what goes into a professional mix from renowned Producer, Songwriter & Mixer Warren Huart, who has worked on several Grammy-nominated albums!
Filling In The Gaps & Learning To Master Pro Tools
In closing, by mastering how to change waveform size in Pro Tools, you’ve unlocked a crucial component of audio editing that will enhance your production quality. By understanding and applying these techniques, you’re now equipped to navigate waveforms with confidence and precision.
Remember, it’s not just about what you see but also how you use these visuals to bring your audio to life.
To ensure your mixes stand out with professional quality, mastering your DAW and its intricacies is essential. Once you’re ready to dive deeper into recording and mixing in Pro Tools, we highly recommend you check out our popular course, “The Ultimate Guide To Pro Tools.”
This comprehensive class will equip you with the knowledge to harness the full potential of Pro Tools, from fundamental techniques to advanced mixing strategies. Begin your journey to audio mastery and get ready to elevate your productions to the next level!


 Benefits of Customizing Waveform Size in Pro Tools


