Reaper.fm is a standout digital audio workstation (DAW) celebrated for its adaptability and efficiency. It remains one of the most popular DAWs on the market, and for good reason! In this guide, we’ll explore how to record in Reaper, focusing on the essentials of recording within this remarkable DAW.
We’ll take you through the entire process, from initial setup to general editing techniques that you can follow along with. Whether you’re a beginner or an experienced user, this guide aims to equip you with the necessary skills for recording in Reaper with confidence.
Why Choose Reaper?
Developed by Cockos, Reaper is a highly customizable digital audio workstation (DAW) known for its versatility, allowing users to tailor its functionality. It features robust MIDI capabilities, a powerful audio engine, and extensive plugin support, all for a budget-friendly price of $60.
Reaper’s comprehensive recording, editing, and mixing tools have made it a favorite among audio industry professionals and enthusiasts. Its intuitive interface and the broad range of editing tools with flexible routing also make for endless creative possibilities.
In addition to these features, Reaper offers scripting and automation features that cater to advanced users in addition to these features. This solidifies Reaper as a top choice for producing high-quality audio recordings.
How to Record Audio in Reaper (Step-by-Step Guide)
In this section, we’ll delve into the practical steps of how to record in Reaper. Specifically, we’ll walk you through the ebasic recording process in Reaper. This will include everything from setting up your equipment to capturing your audio.
#1) Setting Up Your Audio Interface and Microphone in Reaper
Setting up your audio interface and microphone in Reaper is crucial for a successful recording. Here’s a detailed step-by-step guide:
- Connection: Connect your audio interface to your computer using USB or FireWire cables. Ensure a secure and stable connection.
- Microphone: Plug your microphone into the appropriate input on the audio interface. Check the interface’s manual to identify the correct input channel.
- Reaper Preferences: Launch Reaper and go to the “Options” menu, then select “Preferences.” In the “Audio” section, choose your audio interface as both the input and output device.
Once your interface and mic are hooked up, you must configure your audio settings before recording.
#2) Configuring Audio Settings for Optimal Recording
Next, configuring audio settings in Reaper ensures you get the best recording quality. Here’s a step-by-step guide specific to this stage:
- Open Reaper: Launch the Reaper software on your computer.
- Access Preferences: Go to the “Options” menu and select “Preferences.”
- Audio Device Settings: In the Preferences window, navigate to the “Audio” section.
- Select Your Audio Interface: Choose your audio interface from the list of available devices. This should match the interface you set up earlier.
- Adjust Sample Rate: Set the sample rate to match your project’s requirements. Standard rates are 44.1 kHz for CD-quality and 48 kHz for video.
- Buffer Size: Configure the buffer size to balance low latency and smooth recording. Contrarily, smaller buffers reduce latency but demand more processing power.
- Bit Depth: Select the appropriate bit depth next. You will typically use 16-bit for CD-quality and 24-bit for higher resolution.
- Latency Settings: Adjust the latency settings to minimize delay during recording and playback.
- Apply and Save: After configuring these settings, click “Apply” and then “OK” to save your preferences.
Configuring your audio settings correctly ensures that your recording sessions in Reaper are optimized for the best audio quality and performance.
#3) How to Use Reaper’s Track Control Panel
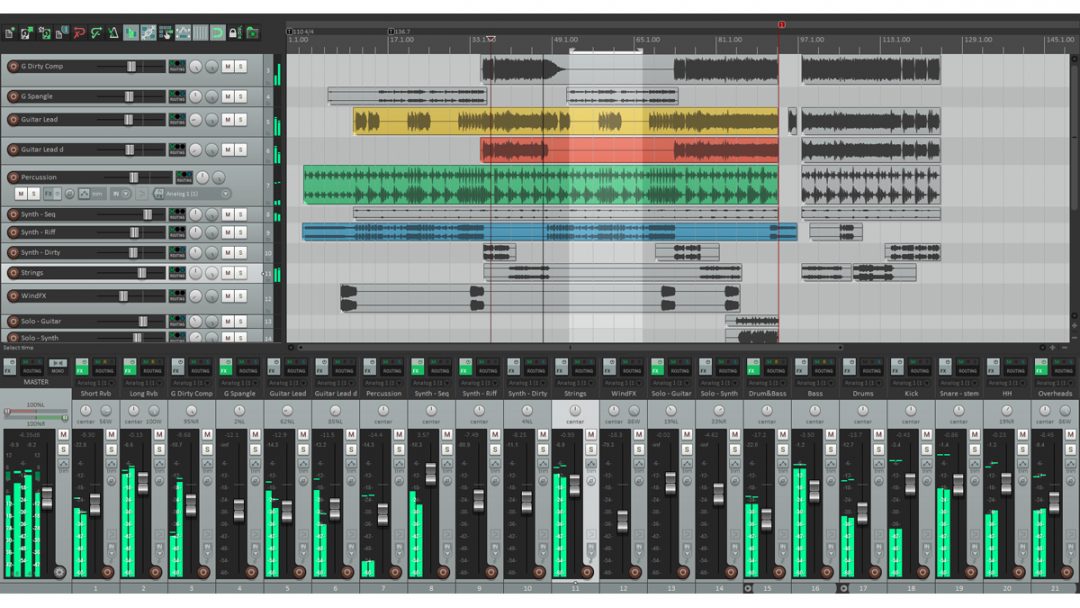
Reaper’s Track Control Panel is crucial for managing and organizing your audio tracks. Here’s a concise guide on using this feature effectively:
- Access the Track Control Panel: In Reaper, locate the Track Control Panel on the left side of the screen.
- Add New Tracks: Click the “+” button in the Track Control Panel to add new audio tracks.
- Naming Tracks: Double-click on track names to rename them for easy identification.
- Adjust Track Parameters: Use the Track Control Panel to adjust parameters like volume, pan, and mute/solo buttons.
- Arrange Tracks: Click and drag tracks to rearrange them in your project.
- Color Coding: Assign colors to tracks for visual organization.
- Grouping: Create track groups to manage multiple tracks together.
- Effects and Routing: Access track effects and routing options from the Track Control Panel.
- Envelopes: You can also utilize track envelopes for automation and fine-tuning.
- Track Management: Right-click on tracks for additional options like duplicating, deleting, and more.
In summary, understanding how to navigate and use Reaper’s Track Control Panel will help you efficiently manage your audio tracks during recording and editing.
Download our most popular resource: 6 Steps for Creating Radio Ready songs to learn the fundamentals of what goes into a professional mix from renowned Producer, Songwriter & Mixer Warren Huart, who has worked on several Grammy-nominated albums!
#4) Initiating the First Take: How to Record in Reaper
Next, to begin with recording in Reaper, follow these steps:
- Select a Track: Ensure you’ve created an audio track for recording.
- Arm the Track: Click the “Arm for recording” button on the track to enable recording.
- Set Recording Options: Configure recording settings in Reaper’s preferences, including file format and sample rate.
- Click Record: Hit the record button to initiate recording.
- Stop Recording: Click the “Stop” button to halt the recording process and save your work.
#5) Monitoring Your Audio Levels for Consistent Quality
Monitoring audio levels is crucial in particular for achieving high-quality recordings in Reaper. Therefore, following these steps and tips will help ensure consistent quality:
- Use Quality Headphones: Invest in good headphones for accurate audio monitoring.
- Watch Input Levels: Accordingly, keep a close eye on input levels to prevent clipping, which can result in distorted recordings.
- Adjust Microphone Gain: Control the input volume by adjusting the microphone gain to achieve the desired audio levels. Therefore, aim for levels that peak around -6dB to -3dB.
- Utilize Meters: Reaper provides real-time level meters that help you monitor audio levels during recording. Monitor these meters to ensure your levels stay within the desired range.
- Conduct Test Recordings: Before your actual recording session, perform a test recording to evaluate the audio quality and levels, making any necessary adjustments for optimal results. In short, this ensures that your final recording will be clean and free from unwanted noise or distortion.
#6) Utilizing Multiple Tracks for Layered Recording
Recording with multiple tracks in Reaper allows you to create complex and layered audio compositions. Follow these steps to get started:
- Add New Tracks: Click “Track” in the menu, then select “Insert New Track” for each additional track you need.
- Arm Tracks: Arm the tracks you want to record by clicking the “Arm for recording” button.
- Record on Separate Tracks: Each track will record audio separately, enabling you to layer different sounds or instruments.
- Mix and Edit: After recording, use Reaper’s mixing and editing tools to adjust the individual tracks and create a cohesive composition.
You can also label tracks to stay organized, use headphones for precise monitoring, experiment with effects and Reaper plugins on individual tracks, and employ automation for dynamic changes.
In addition, consider panning to position sounds in the stereo field. These techniques enhance your ability to create layered audio compositions with precision and creativity.
#7) Making Use of Reaper’s Editing Tools Post-Recording
Altogether, Reaper provides a versatile set of post-recording editing tools to elevate your audio productions. In order to do that, follow these steps:
- Select the Right Tool: Choose from various editing tools, such as the razor tool for precise cuts or the envelope tool for detailed automation.
- Edit with Precision: Cut, copy, paste, and arrange audio regions with meticulous accuracy.
- Apply Effects: Access Reaper’s extensive effects library, including EQ, compression, and reverb for Reaper, to enhance your audio.
- Dynamic Automation: Utilize automation to control parameters over time, creating dynamic changes in your audio.
- Seamless Transitions: Smoothly blend audio regions using crossfades for professional and polished results.
You can refine your recordings and achieve professional-grade audio in Reaper by mastering these editing tools. Whether you’re editing music, podcasts, or any other audio content, these tools provide the flexibility and precision needed for high-quality productions.
Tips and Tricks: Maximizing Your Recording Experience in Reaper
The Importance of Saving and Backing Up Projects
At this point, in Reaper, it’s crucial to prioritize the safety of your projects by regularly saving and creating backups. By doing so, you can ensure that your hard work is protected against unforeseen issues. For this reason, here’s how to do it:
- Regular Saving: Make a habit of saving your project regularly during work sessions. You can use the keyboard shortcut “Ctrl + S” (or “Cmd + S” on Mac) to save your project quickly.
- Backup Versions: Create backup versions of your project at different stages to preserve previous states, allowing you to revert if needed.
- External Drives: Use external drives or network storage to store project backups securely.
- Cloud Storage: Utilize cloud storage services like Dropbox or Google Drive to protect against hardware failures.
By following these steps, you can generally safeguard your Reaper projects and minimize the risk of data loss.
Conclusion: Refining Your Skills and Recording with Confidence in Reaper
In this comprehensive guide, we’ve explored how to record in Reaper step by step. From initial setup to advanced editing techniques, you’ve gained essential skills in audio production. As we have shown, Reaper’s user-friendly interface, robust features, and affordability make it the go-to choice for professionals and beginners.
Consequently, by practicing regularly and maintaining backups, you’ll confidently harness Reaper’s creative potential for future projects.
Whether you’re recording music, podcasts, or any audio content, this guide equips you with the skills to excel in audio recording with Reaper, turning it into your trusted DAW.
Ready To Take Your Reaper Skills To The Next Level?
Get ready to unlock the full potential of Reaper with The Ultimate Guide To Reaper course, led by professional engineer Adam Steel. This comprehensive course, updated for Reaper 7, offers over 12 hours of detailed instruction across 69 chapters.
Dive into essential skills like system setup, recording, editing, and mixing to a professional standard. You’ll also discover a treasure trove of little-known features that streamline your workflow and save you from the trial and error of learning independently.
In short, this course is perfect for those eager to produce high-quality audio projects efficiently. In other words, this course is a valuable investment for anyone serious about mastering Reaper. Sign up today!


